
Ubuntu: DynDNS सर्वर सेट करें
यदि आप हमेशा इंटरनेट से अपने कंप्यूटर तक पहुंचना चाहते हैं तो आप Ubuntu के तहत एक DynDNS सर्वर सेट कर सकते हैं। आपको बस एक गतिशील डीएनएस सेवा और एक छोटे से सॉफ्टवेयर के साथ एक खाता है जो आपके आईपी को गतिशील डीएनएस प्रदाता के साथ अपडेट करता है। सर्वर सेवाएँ पहले से ही बाहरी लोगों के लिए उपलब्ध हैं।
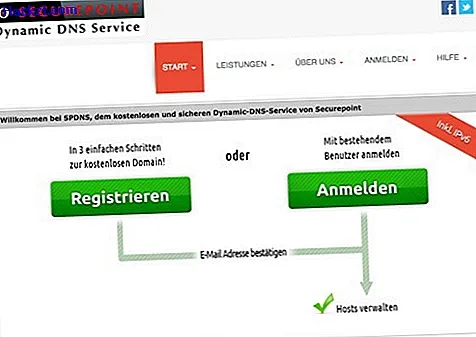
Ubuntu के लिए DynDNS सर्वर सेट करें - प्रदाता का चयन करें
सबसे पहले, एक प्रदाता चुनें, जिसके पास प्रोग्राम में डायनेमिक DNS सेवाएं हैं। सबसे प्रसिद्ध डीएनडीएनएस के अलावा, कई मुफ्त प्रदाता भी हैं। आपको निशुल्क DynDNS विकल्पों के हमारे अवलोकन में कई प्रदाता मिलेंगे।
- अपनी पसंद के प्रदाता के साथ एक खाता बनाएँ।
- अपने डायनेमिक DNS क्लाइंट के लिए डेटा लिखें। यह भी जांचें कि आप किस सर्वर से बाद में डीएनएस क्लाइंट प्रोग्राम में लॉग इन कर सकते हैं और प्रदाता कौन से प्रोटोकॉल का उपयोग करता है। कई प्रदाता अपने स्वयं के कार्यक्रम की पेशकश करते हैं जो आपके खाते को अद्यतित रखता है और उबंटू पीसी के आईपी पर गुजरता है - लेकिन उनमें से ज्यादातर विंडोज के लिए हैं।
- डायनेमिक DNS क्लाइंट के लिए एक नए खाते, उपयोगकर्ता नाम, पासवर्ड, प्रोटोकॉल और सर्वर पते के साथ, अब आप अपने स्वयं के नेटवर्क पर जा सकते हैं। "Meineadresse.dyndns.org" योजना के अनुसार आपने जो पता चुना है, उसका एक नोट बनाएँ।
राउटर सेट करें और ddclient स्थापित करें
ताकि होम नेटवर्क में आपका आंतरिक आईपी लगातार बदल न जाए, रूटर में डीएचसीपी सर्वर के साथ एक निश्चित आईपी आरक्षित करना सबसे अच्छा है। फिर आप उबंटू में संबंधित बंदरगाहों पर से गुजर सकते हैं। अब आपको केवल ddclient प्रोग्राम की आवश्यकता है और आपका Ubuntu PC बाहर से सुलभ है:
- अपने राउटर पर लॉग ऑन करें और डीएचसीपी सर्वर में अपने उबंटू पीसी के लिए एक निश्चित आईपी पता आरक्षित करें। आप इस गाइड में वहां पहुंचने का तरीका जान सकते हैं। अक्सर यह "नेटवर्क" के तहत सिस्टम सेटिंग्स में एक मैनुअल आईपी दर्ज करने के लिए पर्याप्त है।
- अब राउटर में पोर्ट फ़ॉरवर्डिंग या "पोर्ट फ़ॉरवर्डिंग" के लिए मेनू देखें। आप बाद में बाहर से अपने Ubuntu पीसी के साथ उपयोग करना चाहते हैं, जो सेवाओं के आधार पर, आप इसी बंदरगाहों को अग्रेषित करना चाहिए। HTTP का उपयोग करता है, उदाहरण के लिए, पोर्ट 80, एफ़टीपी पोर्ट 20 और एसएसएच पोर्ट 22।
- आपने अब राउटर सेट किया है, अब डायनेमिक DNS क्लाइंट स्थापित करें। Ubuntu में एक टर्मिनल खोलें और इस कमांड को टाइप करें:> sudo apt-get install ddclient <। अपने पासवर्ड के साथ कमांड की पुष्टि करें और निर्देशों का पालन करें।
- अब आपसे पूछा जाएगा कि आपने किस डायनामिक DNS प्रदाता को चुना है। यदि आपको सूची में अपना प्रदाता नहीं मिला है, तो "अन्य" चुनें और अपना लॉगिन डेटा, प्रोटोकॉल और अपने प्रदाता के सर्वर का पता प्राप्त करें।
- डायनेमिक DNS सर्वर के बारे में पूछे जाने पर, पता दर्ज करें (उदाहरण के लिए "members.dyndns.org")। फिर प्रोटोकॉल सेट करें (उदाहरण के लिए "dyndns2"), और अंत में आपका लॉगिन डेटा।
- नेटवर्क इंटरफ़ेस के लिए, केबल कनेक्शन के लिए eth0 चुनें या रेडियो कनेक्शन के लिए wlan0। तब डोमेन नाम का अनुरोध किया जाता है, यानी वह पता जिस पर आप बाद में बाहर से पहुंच सकते हैं। इसे पूरी तरह से दर्ज करें।
- आप लगभग पूर्ण हो चुके हैं: ddclient को अब सेट किया गया है और फिर इसे मैन्युअल रूप से कमांड> sudo सेवा ddclient start <के साथ शुरू किया जा सकता है। अब आप इंटरनेट से पहुँच सकते हैं। सुरक्षा के बारे में चिंता करने और सभी सेवाओं और बंदरगाहों को बंद करने के लिए स्वतंत्र महसूस करें जो आपको जरूरी नहीं कि बाहर से पहुंचें।

यदि आप अपने राउटर पर पहले कभी नहीं गए हैं, तो अपने राउटर को कॉन्फ़िगर करने के तरीके पर इस व्यावहारिक टिप को पढ़ें।